
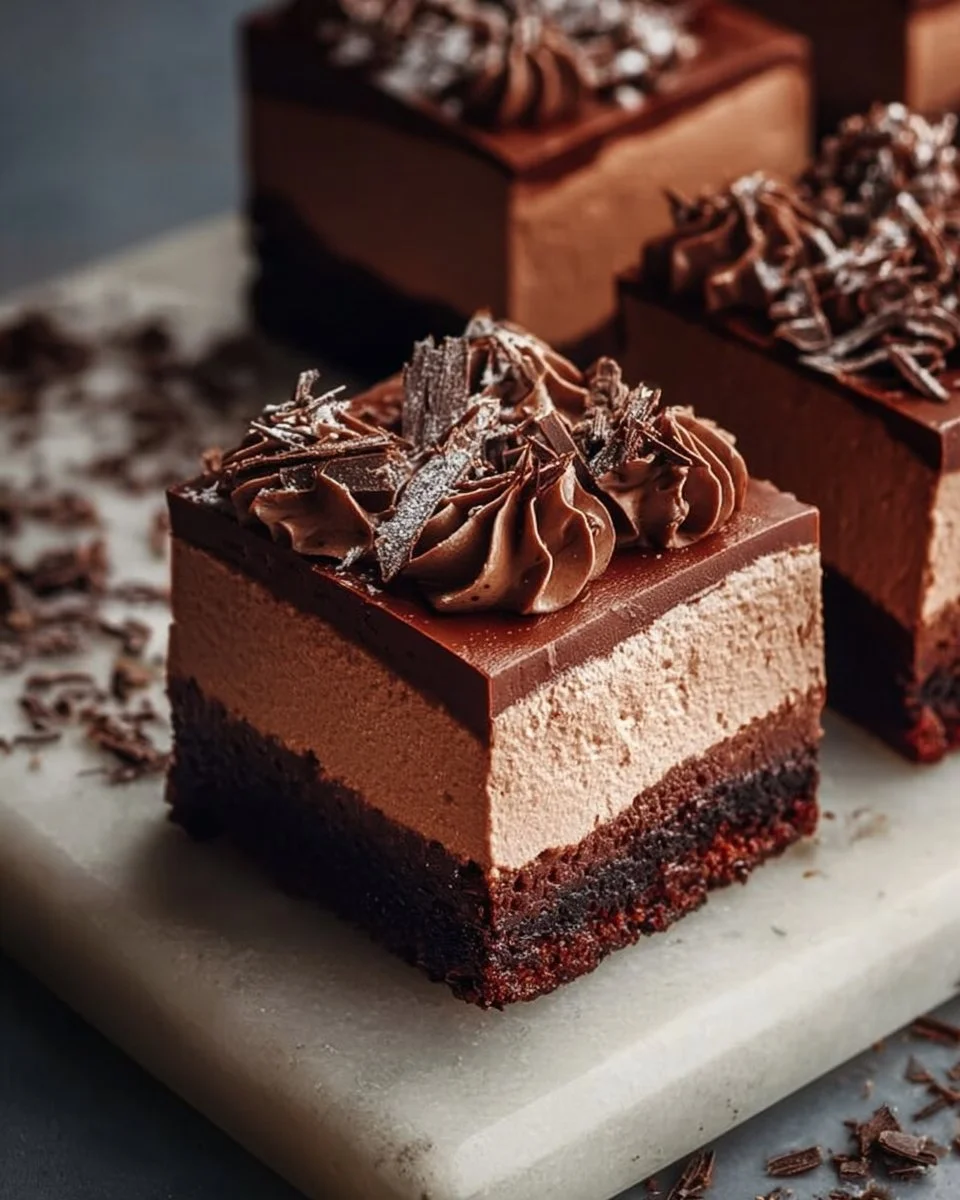
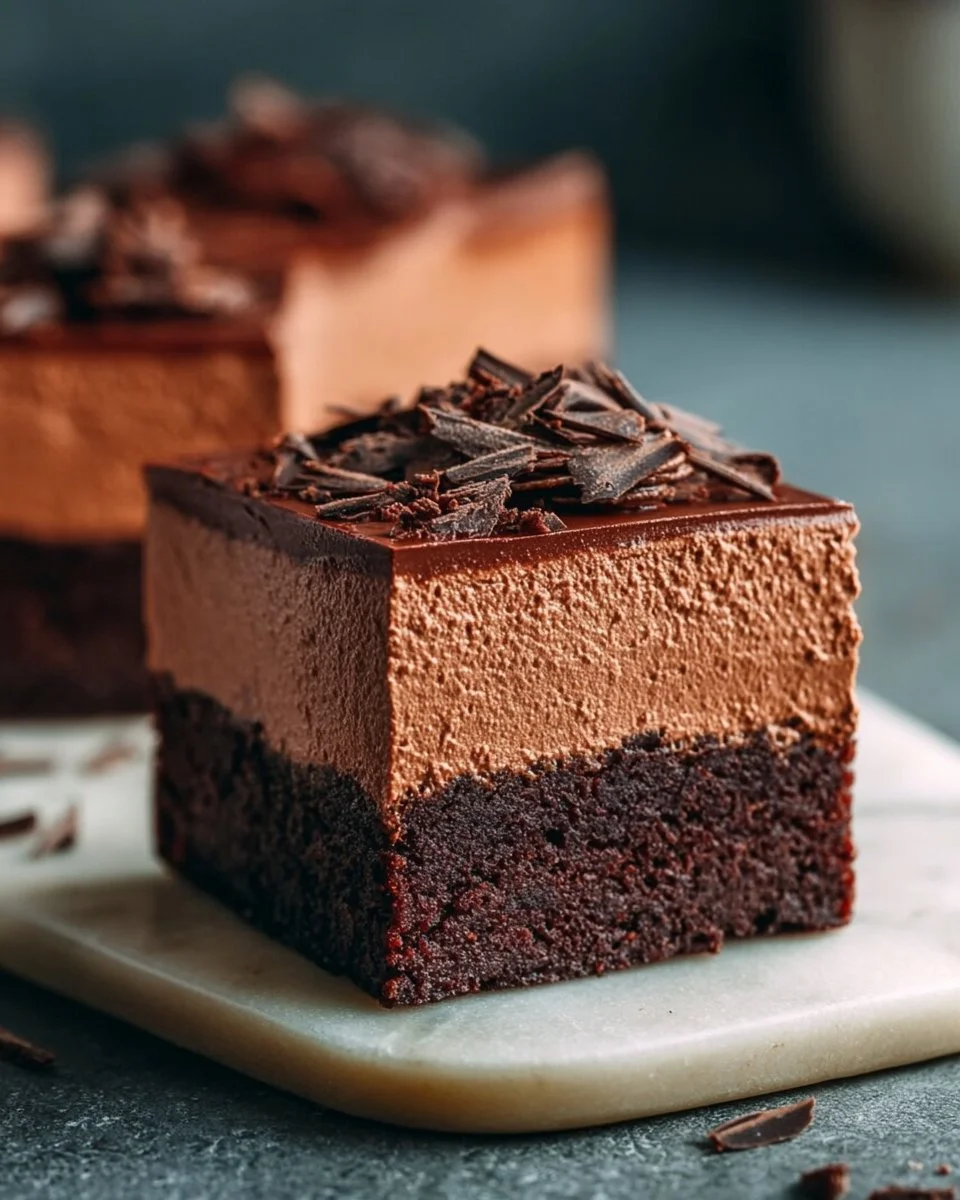
Chocolate Mousse Brownies
Chocolate mousse brownies are the kind of dessert that feels fancy but comes together faster than you’d expect. A dense, fudgy brownie base gets topped with a light, cloud-like chocolate mousse — perfect for dinner parties, birthdays, or just a weekend treat when you want something that tastes indulgent without a lot of fuss. I’ve made this recipe on busy weeknights and for holiday gatherings: the contrast between the rich brownie and airy mousse always gets compliments.
For a juicy contrast, try one of my favorite cookie recipes alongside for coffee after dessert; I love a batch of bakery-style chocolate chip cookies when I’m serving sweets.
Why you’ll love this dish
This recipe marries two textures people crave: the chewy, slightly crumbly brownie and an ethereal chocolate mousse on top. It’s perfect when you want dessert that looks impressive but doesn’t require tempering chocolate or shaping layers. A few reasons to try it:
- Crowd-pleaser: rich enough for chocoholics, light enough to finish a meal.
- Make-ahead friendly: the mousse needs chilling, which fits well into party prep.
- Flexible: swap chocolate types, add espresso, or make gluten-free tweaks.
“The mousse makes every bite feel special — like a little celebration.” — a quick note from my last dinner party
How this recipe comes together
Before you start, here’s a quick overview of the process so you know what to expect. First you’ll make a simple brownie batter, bake it in a 9×13 pan, and let it cool completely. While the brownies cool, you whip cold heavy cream to soft peaks and gently fold in melted semi‑sweet chocolate with powdered sugar to create the mousse. Finally, you spread the mousse over the cooled brownies and chill until set. The total active time is mostly mixing and whipping; most of the waiting is chilling.
What you’ll need
- 1 cup unsalted butter (melted) — or use salted and reduce added salt
- 2 cups granulated sugar
- 4 large eggs
- 1 teaspoon vanilla extract
- 1 cup all-purpose flour (use 1:1 gluten-free flour if needed)
- 1/2 cup unsweetened cocoa powder (Dutch-processed or natural)
- 1/2 teaspoon salt
- 1 cup heavy cream (very cold)
- 1 cup semi-sweet chocolate chips (or chopped chocolate)
- 1/2 cup powdered sugar
Notes: For a deeper flavor, substitute 2 tablespoons espresso powder into the dry ingredients. If you want a lighter mousse, increase the heavy cream to 1 1/4 cups and reduce melted chocolate slightly.
Step-by-step instructions
- Preheat the oven to 350°F (175°C). Grease a 9×13-inch baking pan and line with parchment if you like easier removal.
- In a large mixing bowl, melt the butter. Add the granulated sugar and stir until combined and slightly glossy.
- Add the eggs one at a time, mixing well after each addition. Stir in the vanilla extract.
- Sift or whisk together the flour, unsweetened cocoa powder, and salt. Fold the dry mix into the wet ingredients until just combined.
- Pour the brownie batter into the prepared pan and smooth the top. Bake for 25–30 minutes, or until a toothpick inserted comes out with moist crumbs (not wet batter).
- Remove from the oven and let the brownies cool completely in the pan on a wire rack. Cooling fully prevents the mousse from melting.
- For the mousse, chill a mixing bowl and beaters in the fridge for 10–15 minutes if your kitchen is warm. Pour the heavy cream into the chilled bowl and whip until soft peaks form.
- Melt the semi-sweet chocolate chips in 20–30 second bursts in the microwave, stirring between bursts, or melt gently over a double boiler. Let the melted chocolate cool slightly so it’s warm but not hot.
- Gently fold the melted chocolate into the whipped cream using a spatula. Add the powdered sugar and fold until smooth and airy. Avoid overmixing to keep the mousse light.
- Spread the chocolate mousse evenly over the cooled brownie layer with an offset spatula.
- Chill the assembled brownies in the refrigerator for at least one hour to firm up the mousse.
- Use a sharp knife to cut into squares and serve chilled or at cool room temperature.
Best ways to enjoy it
Serve chilled slices on a dessert plate with a dusting of cocoa or a few fresh raspberries for brightness. A dollop of lightly whipped cream, a sprinkle of flaky sea salt, or a few chocolate shavings elevates the presentation. Pair with strong coffee, espresso, or a berry compote — and for a grown-up twist, a small pour of coffee liqueur complements the chocolate beautifully.
Storage and reheating tips
- Refrigerator: Store leftover squares in an airtight container in the fridge for up to 4 days. Because the topping is dairy mousse, keep it chilled.
- Freezing: You can freeze uncut brownies (without mousse) wrapped tightly for up to 2 months. For assembled bars, freeze individual slices on a tray, then transfer to a freezer-safe container; thaw in the fridge overnight. Texture may change slightly after thawing.
- To serve after chilling: Let refrigerated slices sit at room temperature 10–15 minutes before eating to soften the mousse slightly. Avoid leaving mousse-topped portions out over 2 hours to prevent food-safety issues.
Pro chef tips
- Don’t overbake the brownies. Pull them when a toothpick shows moist crumbs — that keeps the base fudgy.
- Use a cold bowl and cold cream for the mousse. Warm tools make whipping slower and less stable.
- Let melted chocolate cool a bit before folding into cream; hot chocolate will deflate the mousse.
- For cleaner cuts, chill the whole pan until firm and run a knife under hot water, dry it, then slice. Repeat between cuts.
If you like adding nutty depth to baked goods, try the approach that works in my favorite brown-butter chocolate chip cookies—browning butter before adding it to the batter gives a toasty flavor that also plays nicely with chocolate.
Creative twists
- Espresso boost: dissolve 1 teaspoon instant espresso in the melted chocolate for mocha notes.
- Boozy mousse: fold in 1–2 tablespoons of bourbon, Kahlúa, or dark rum with the melted chocolate.
- White chocolate: swap semi-sweet for white chocolate and add a teaspoon of lemon zest for brightness.
- Nutty crunch: sprinkle toasted hazelnuts or chopped pecans between the brownie and mousse layer.
- Vegan/dairy-free: use coconut cream whipped to peaks and dairy-free chocolate; use a flax-egg or commercial egg replacer and a vegan butter for the base.
- Individual portions: bake in square or round mini pans and pipe mousse for a fancier look.
Common questions
Q: How long does this take from start to finish?
A: Active time is about 30–40 minutes (mixing, baking, whipping); allow at least 1 hour of chilling, so plan ~2 hours total including cooling.
Q: Can I make the brownies ahead and add mousse later?
A: Yes. The brownie layer can be baked and wrapped in plastic wrap for up to 2 days in the fridge. Add the mousse the day you plan to serve for the best texture.
Q: Can I freeze the assembled brownies?
A: You can, but the mousse can change texture after freezing. For best results freeze the brownie layer alone and add mousse after thawing.
Q: Any substitutions for heavy cream?
A: For a lighter mousse, use a combination of whipped cream and stabilized whipped topping, or for dairy-free use chilled coconut cream. Note texture and flavor will differ.
Q: Is it safe to leave mousse-topped brownies at room temperature during a party?
A: Because the topping contains dairy, avoid leaving it out longer than 2 hours. If serving outdoors on a warm day, keep chilled trays and replenish often.
Q: Can I use store-bought chocolate mousse instead?
A: You can, but homemade mousse has a fresher texture and you can control sweetness and chocolate intensity.
Conclusion
For an indulgent but approachable dessert that balances rich brownie density with airy mousse, this recipe is a reliable winner. If you want to compare another trusted version or draw inspiration for presentation and ingredient ratios, check this detailed take on Chocolate Mousse Brownies | The Domestic Rebel.
Print
Chocolate Mousse Brownies
- Total Time: 70 minutes
- Yield: 12 servings
- Diet: Vegetarian
Description
Indulgent brownies topped with light and airy chocolate mousse, perfect for any occasion.
Ingredients
- 1 cup unsalted butter (melted)
- 2 cups granulated sugar
- 4 large eggs
- 1 teaspoon vanilla extract
- 1 cup all-purpose flour (or 1:1 gluten-free flour)
- 1/2 cup unsweetened cocoa powder
- 1/2 teaspoon salt
- 1 cup heavy cream (very cold)
- 1 cup semi-sweet chocolate chips (or chopped chocolate)
- 1/2 cup powdered sugar
Instructions
- Preheat the oven to 350°F (175°C). Grease a 9×13-inch baking pan and line with parchment if desired.
- In a large mixing bowl, melt the butter. Add the granulated sugar and stir until combined and slightly glossy.
- Add the eggs one at a time, mixing well after each addition. Stir in the vanilla extract.
- Sift or whisk together the flour, unsweetened cocoa powder, and salt. Fold the dry mix into the wet ingredients until just combined.
- Pour the brownie batter into the prepared pan and smooth the top. Bake for 25-30 minutes, or until a toothpick inserted comes out with moist crumbs.
- Remove from the oven and let the brownies cool completely on a wire rack.
- For the mousse, chill a mixing bowl and beaters in the fridge for 10-15 minutes. Pour the heavy cream into the chilled bowl and whip until soft peaks form.
- Melt the semi-sweet chocolate chips in the microwave or over a double boiler; let it cool slightly.
- Gently fold the melted chocolate into the whipped cream, add the powdered sugar, and mix until smooth.
- Spread the mousse evenly over the cooled brownie layer.
- Chill the assembled brownies in the refrigerator for at least one hour to firm up the mousse.
- Cut into squares and serve chilled or at cool room temperature.
Notes
For a deeper flavor, substitute 2 tablespoons espresso powder into the dry ingredients. For a lighter mousse, increase heavy cream to 1 1/4 cups and reduce melted chocolate slightly.
- Prep Time: 40 minutes
- Cook Time: 30 minutes
- Category: Dessert
- Method: Baking
- Cuisine: American


