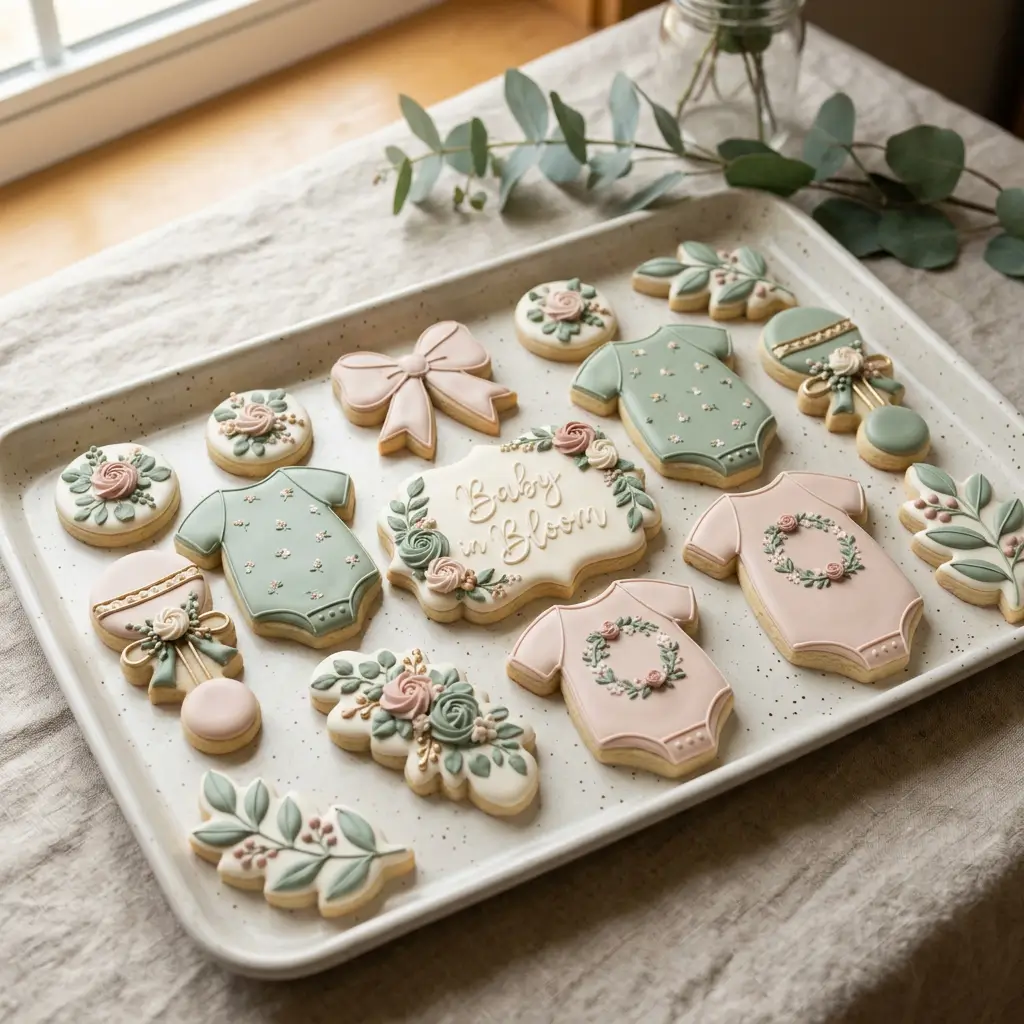
Baby in Bloom Cookies Royal Icing
The first time I attempted baby in bloom cookies royal icing, I focused only on colors. I mixed blush and sage perfectly. I piped tiny flowers carefully. Yet the final result looked flat and slightly messy. The icing bled in places. The florals lacked depth. After testing layer timing, spacing rules, and consistency control, everything changed. The cookies suddenly looked balanced and professional. In this guide, you will learn how to plan your layout, control icing consistency, create watercolor backgrounds, pipe dimensional florals, prevent bleeding, and build a repeatable decorating system for baby shower sets.
Table of Contents
Table of Contents
Quick Facts
- Theme: Floral baby shower
- Skill Level: Beginner to intermediate
- Required Icing: Stiff, medium, flood
- Layer Dry Time: 30–60 minutes between stages
- Full Dry Time: 8–12 hours
- Best Cookie Base: 1/4‑inch no‑spread sugar cookies
For best results, use the Sugar Cookies for Royal Icing (No‑Spread Method) and stable Royal Icing for Decorated Cookies as your base.
Before You Start: Design Planning System
Most decorating mistakes happen before piping begins.
Professional baby in bloom cookies royal icing sets follow three simple rules:
- Limit color palette (2–3 main colors).
- Leave negative space.
- Vary element size.
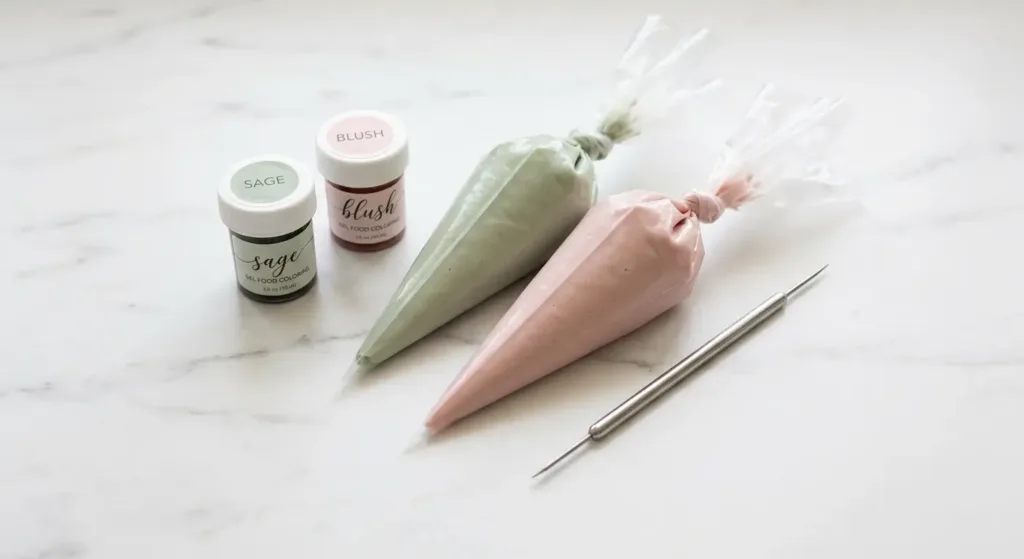
Choose a Color Palette
Classic combinations:
- Sage + Blush + Ivory
- Dusty Rose + Cream + Soft Green
- Mauve + Gold + White
Let gel colors rest 30 minutes after mixing. They deepen naturally.
Layout Templates (3 Proven Floral Arrangements)
1. Corner Cluster Layout
Florals grouped in one corner.
Opposite side left minimal.
Best for plaque cookies with lettering.
2. Crescent Floral Frame
Flowers curve along one edge.
Leaves fill gaps.
Creates movement and elegance.
3. Scattered Mini Blooms
Tiny blossoms spaced evenly.
Ideal for round cookies.
Balanced spacing elevates baby in bloom cookies royal icing from amateur to polished.
Royal Icing Consistency Control (Foundation of Success)
Correct texture prevents most decorating issues.
| Use | Consistency | Flow Time |
|---|---|---|
| Base flood | Flood | 8–12 sec |
| Outline | Medium | 15–20 sec |
| Lettering | Medium | 15 sec |
| Flowers | Stiff | 20–25 sec |
Test by dragging a knife line through icing and counting seconds until smooth.
Consistency matters more than piping skill.
Step‑by‑Step Decorating Method
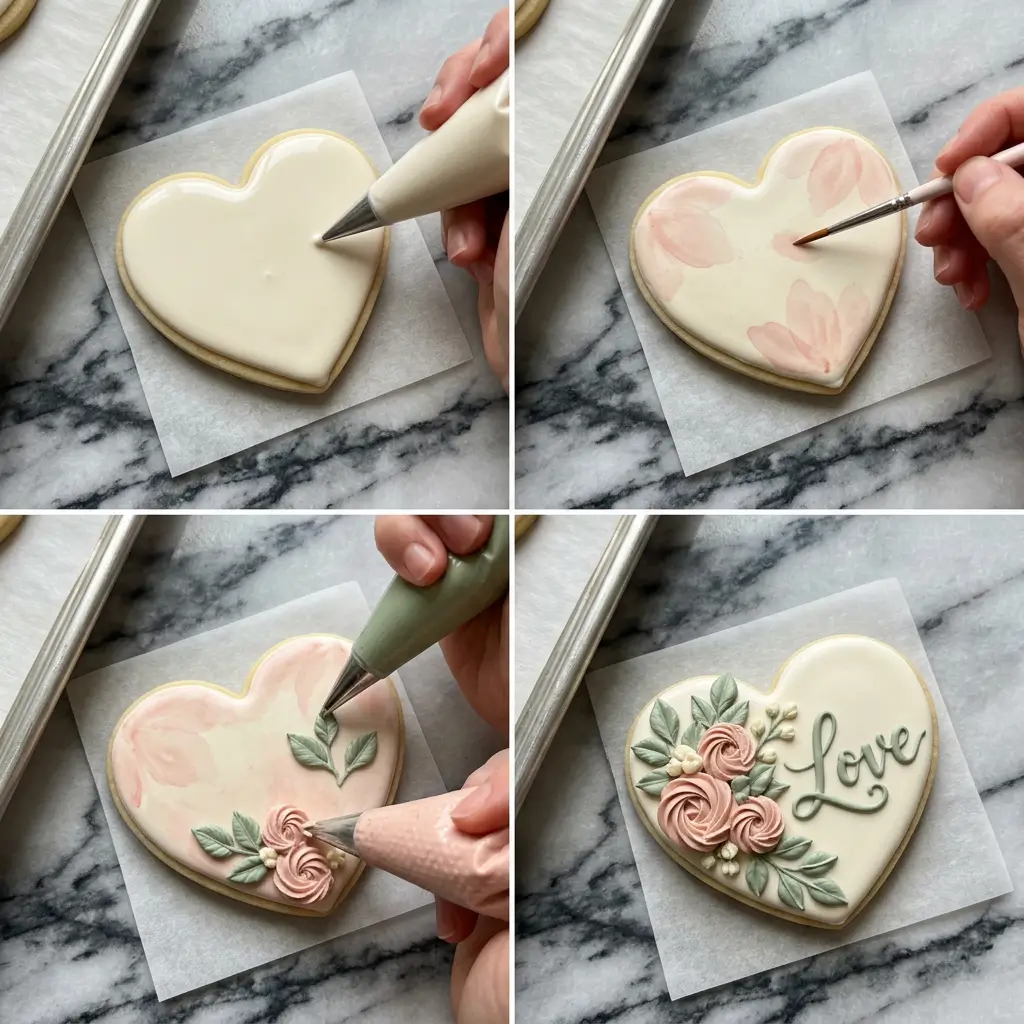
Step 1: Flood the Base
Pipe outline first.
Fill center using flood icing.
Use a scribe tool to smooth surface.
Tap gently to release bubbles.
Allow 30–60 minutes to crust before next step.
Step 2: Add Watercolor Depth
Dilute gel color using clear extract.
Do not use water. Water weakens structure.
Lightly brush blush tones first.
Blend sage softly around edges.
Let dry at least 1 hour before florals.
Watercolor adds softness and dimension to baby in bloom cookies royal icing.
Step 3: Pipe Floral Base Shapes
Use stiff icing.
Pipe rosettes using circular wrist motion.
Pipe leaves using gentle pull and lift technique.
Vary size slightly for natural look.
Allow 20–30 minutes to crust.
Step 4: Add Second Floral Layer
Layer smaller petals over crusted flowers.
Add tiny white dots in centers.
Layering creates depth.
Step 5: Lettering and Plaque Borders
Use medium consistency icing.
Pipe steady lines.
Avoid stopping mid‑stroke.
For embossed plaque look:
- Outline border.
- Flood interior.
- Add raised edge once crusted.
Step 6: Micro Details
Add:
- Tiny gold specks
- Small filler leaves
- White dot accents
Stop before design looks crowded.
Step 7: Full Dry and Set
Allow cookies to dry uncovered 8–12 hours.
Use a fan for airflow.
Avoid humid rooms.
Production Timeline (For Events or Selling)
| Task | Time Needed |
|---|---|
| Bake cookies | Day 1 |
| Flood base | Day 2 morning |
| Florals & lettering | Day 2 afternoon |
| Full dry | Overnight |
| Packaging | Day 3 |
Planning ahead ensures smooth baby shower preparation.
Advanced Troubleshooting Guide
| Problem | Cause | Fix |
|---|---|---|
| Colors bleeding | Base not crusted | Wait longer |
| Butter bleed spots | High fat migration | Use fresh parchment + cool storage |
| Cracks in florals | Icing too thick | Add few drops water |
| Dull finish | Humidity | Increase airflow |
| Uneven spacing | No layout planning | Sketch design first |
Butter bleed happens when oils rise through icing. Store cookies in cool area and avoid stacking while warm.
Beginner vs Intermediate Approach
Beginner Method
- Use only 2 colors
- Skip watercolor step
- Pipe simple 5‑petal flowers
Intermediate Method
- Add watercolor background
- Layer 2‑tone florals
- Add embossed lettering
Both approaches work for baby in bloom cookies royal icing themes.
Practice Sheet Technique
Before decorating final cookies:
Pipe flowers on parchment paper.
Practice spacing and wrist control.
Adjust icing thickness if petals slump.
This reduces waste and increases confidence.
Composition Rules for Professional Results
- Odd numbers look more natural.
- Large flower + medium + small = balanced cluster.
- Leave breathing space.
Visual balance makes designs feel intentional.
Packaging & Storage Tips
- Use clear heat‑sealed bags.
- Add blush or sage ribbon.
- Insert theme tag.
Store in airtight container.
Avoid humidity.
Proper storage preserves the clean finish of baby in bloom cookies royal icing.
Why This Method Works
Layer timing prevents bleeding.
Consistency control ensures structure.
Limited color palette improves elegance.
Planning layout avoids overcrowding.
Professional decorators focus on systems, not just technique.
For perfect cookie base, read Sugar Cookies for Royal Icing (No‑Spread Method).
For stable icing recipe, visit Royal Icing for Decorated Cookies.
For theme inspiration and pricing ideas, explore Baby in Bloom Cookies Ideas.
FAQ :
What consistency is best for baby in bloom cookies royal icing?
Use flood for base, stiff for florals, and medium for lettering.
How long should I wait between layers?
Wait at least 30–60 minutes for the base to crust before adding details.
Why are my colors bleeding?
You added details before the flood layer dried enough.
How far in advance can I make baby shower cookies?
You can decorate up to 5 days before the event if stored airtight.
How do I prevent butter bleed?
Store cookies in a cool, dry place and avoid stacking while warm.
Can beginners make floral royal icing cookies?
Yes. Start with simple layouts and two colors only.

Baby in Bloom Cookies Royal Icing
- Total Time: 12 hours
- Yield: 24 decorated cookies
- Diet: Vegetarian
Description
Baby in Bloom cookies royal icing designed with balanced layouts, watercolor backgrounds, and dimensional florals. This step-by-step decorating system helps prevent bleeding, improve spacing, and create professional baby shower cookie sets.
Ingredients
- Royal icing in stiff consistency (20–25 second)
- Royal icing in medium consistency (15–20 second)
- Royal icing in flood consistency (8–12 second)
- Gel food coloring (sage, blush, ivory, mauve, cream)
- Clear extract (for watercolor effect)
- 1/4-inch no-spread sugar cookies, fully cooled
Instructions
- Plan layout and choose 2–3 main colors. Leave negative space and vary element sizes.
- Outline cookie with medium consistency icing. Flood base with flood icing and smooth using a scribe tool. Allow 30–60 minutes to crust.
- Create watercolor background by diluting gel color with clear extract. Lightly brush onto crusted surface. Let dry at least 1 hour.
- Pipe florals using stiff icing. Create rosettes with circular wrist motion and leaves using pull-and-lift technique. Allow 20–30 minutes to crust.
- Add second floral layer and small center details for dimension.
- Pipe lettering and borders using medium consistency icing. Avoid stopping mid-stroke.
- Add micro details such as white dots or small accent leaves. Do not overcrowd design.
- Allow cookies to dry uncovered 8–12 hours with airflow before packaging.
Notes
Use proper consistency control to prevent bleeding. Always allow base layers to crust before adding details. Store decorated cookies in airtight containers in a cool, dry place. Avoid stacking while warm to prevent butter bleed.
- Prep Time: 1 hour
- Cook Time: 0 minutes
- Category: Dessert
- Method: Decorating
- Cuisine: American