
Instant Pot Honey Garlic Chicken
I’ve been making this Instant Pot honey garlic chicken on busy weeknights for years. It’s a sweet-savory one-pot dinner that comes together fast, doesn’t demand babysitting, and reliably pleases picky eaters. The sauce reduces into a glossy glaze while the chicken stays tender — a combo that turns a simple ingredient list into something feel-good and comfortingly familiar. If you enjoy fuss-free, flavor-forward weeknight meals, you might also like this crockpot garlic parmesan chicken pasta for another hands-off dinner option.
Why you’ll love this dish
This Instant Pot honey garlic chicken hits several useful marks: it’s quick (pressure-cooked in minutes), budget-friendly (basic pantry staples), and kid-approved thanks to the mellow sweet-garlic sauce. It’s also great when you need a make-ahead protein for meal prep or a simple centerpiece for family dinners. Because the Instant Pot seals in steam, the chicken stays juicier than many stovetop methods, and the sauce concentrates without constant stirring. That makes it perfect for weeknights, casual entertaining, or when you want a shortcut to a takeout-style glaze without ordering in.
“The sauce is sticky but clean — not cloying — and the chicken stays unbelievably tender.” — frequent home cook
How this recipe comes together
Here’s the step-by-step plan so you know what to expect before you start:
- Brown the chicken briefly on the Instant Pot’s Sauté setting to build flavor and color.
- Mix a simple honey-soy-garlic sauce, pour it over the chicken, then pressure cook to finish.
- Let the pot naturally release pressure for a few minutes to keep the meat moist, then quick-release the remainder.
- Finish with sliced green onions and a quick sauce-thickening step if you prefer a glaze.
This overview keeps the process simple and helps you move through the kitchen confidently.
What you’ll need
- 1 lb chicken breasts
- 1/2 cup honey
- 1/4 cup soy sauce (or low-sodium soy sauce)
- 4 cloves garlic, minced
- 1 tablespoon olive oil
- Salt and pepper to taste
- Green onions for garnish
Notes and substitutions: use boneless skinless chicken thighs instead of breasts for more forgiving results; swap maple syrup for honey in a pinch; tamari or coconut aminos work as gluten-free soy alternatives.
Step-by-step instructions
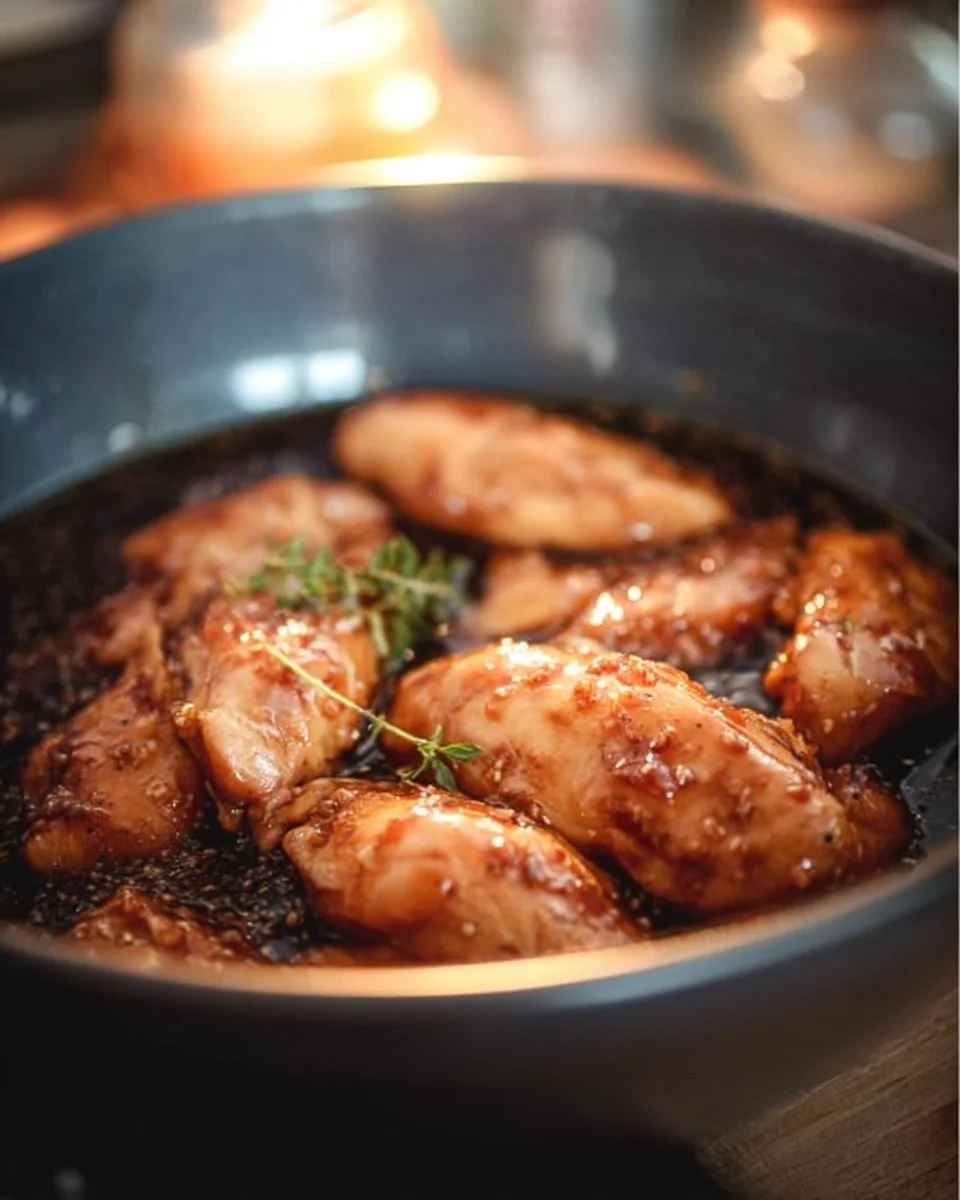
- Turn the Instant Pot to Sauté and add the olive oil. Heat until shimmering.
- Season the chicken breasts lightly with salt and pepper. Add them to the pot and brown for 1–2 minutes per side. You’re not cooking them through — just building color.
- In a small bowl, whisk together the honey, soy sauce, and minced garlic until smooth.
- Pour the honey-garlic mixture over the seared chicken, scraping up any browned bits from the bottom with a wooden spoon.
- Close the lid and set the Instant Pot to Manual/High pressure for 10 minutes. Ensure the valve is set to “Sealing.”
- When the cook time finishes, allow a natural pressure release for 5 minutes, then carefully switch the valve to “Venting” for a quick release of the remaining pressure.
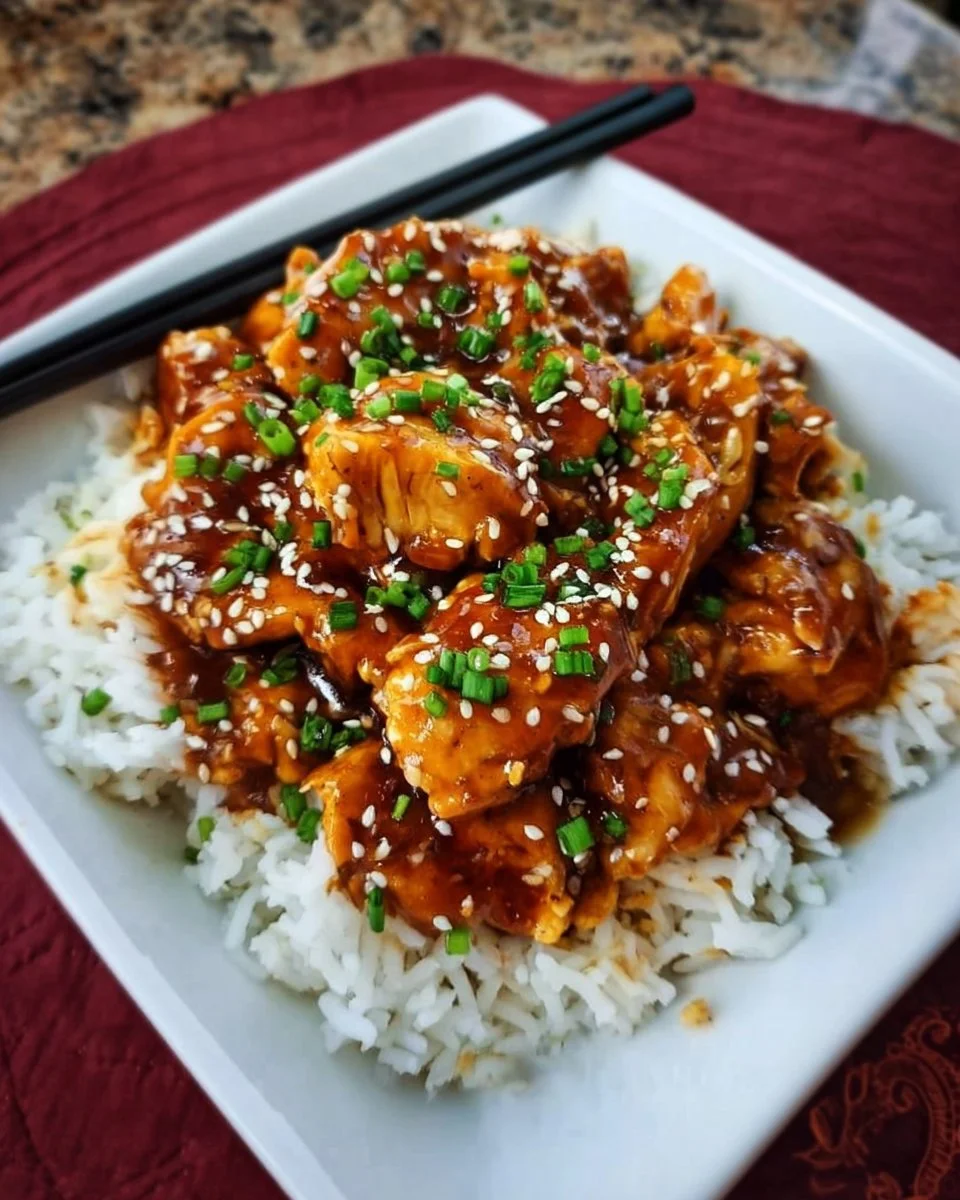
- Remove the chicken to a cutting board. If you want a thicker glaze, switch the pot back to Sauté and simmer the sauce 2–4 minutes, or whisk in a 1:1 slurry of cornstarch and cold water and cook until glossy. Slice the chicken and serve topped with sliced green onions.
Best ways to enjoy it
This honey garlic chicken is incredibly versatile. Serve it over steamed jasmine rice or sticky rice to soak up the glaze. For a lighter plate, pair it with sautéed green beans, roasted broccoli, or a crisp cucumber salad for contrast. It also makes a lovely filling for lettuce wraps or rice bowls with quick-pickled red onion, shredded carrots, and a sprinkle of sesame seeds. If you want a heartier side, try it with garlic mashed potatoes or parmesan garlic chicken and potatoes for a cozy pairing.
Storage and reheating tips
- Refrigerate: Store cooled leftovers in an airtight container for up to 3–4 days.
- Freeze: Portion into freezer-safe containers and freeze for up to 3 months. Thaw overnight in the fridge before reheating.
- Reheating: Gently reheat in a skillet over medium-low heat with a splash of water or broth to loosen the sauce, or microwave covered in 30-second bursts until 165°F (74°C) throughout. Always reheat to at least 165°F to ensure food safety.
- Safety tip: Don’t leave cooked chicken at room temperature for more than 2 hours (1 hour if hot weather).
Pro chef tips
- Deglaze the pot: After browning the chicken, pour a tablespoon of water or broth into the hot pot and scrape up browned bits before adding the sauce. That prevents a burn notice and boosts flavor.
- Check internal temp: Use an instant-read thermometer; chicken is safe at 165°F (74°C). The Instant Pot’s pressure method gets you there reliably.
- Thickness control: If you like a glossy, clingy glaze, finish the sauce on Sauté and add a cornstarch slurry (1 teaspoon cornstarch + 1 teaspoon water) little by little until it reaches the desired consistency.
- Even slices: Let the cooked chicken rest 3–5 minutes before slicing to keep juices locked inside.
Flavor swaps
- Spicy honey garlic: Add 1–2 teaspoons sriracha or a pinch of red pepper flakes to the sauce.
- Asian sesame: Stir 1 teaspoon toasted sesame oil into the sauce and top with toasted sesame seeds.
- Gluten-free: Use tamari or coconut aminos in place of soy sauce.
- Vegetarian twist: Replace chicken with firm tofu — press, sear, and pressure cook for 3–4 minutes with the same sauce (or omit pressure and simmer).
- Citrus lift: Add 1 tablespoon rice vinegar or a squeeze of lime for brightness.
Common questions
Q: How long does the whole recipe take from start to finish?
A: Plan about 25–30 minutes total: 5–8 minutes to brown and prep, 10 minutes pressure cook, 5–7 minutes for pressure release and finishing the sauce.
Q: Can I use frozen chicken breasts?
A: Yes — you can cook from frozen. Increase pressure time to 12–14 minutes and allow a natural release of 10 minutes for best results. Ensure the breasts are separated and not in one solid block.
Q: Can I double the recipe?
A: You can double the sauce and chicken, but avoid overfilling the Instant Pot. Keep total volume below the max fill line (typically 2/3 full for pressure cooking). You may need an extra minute or two of cook time for larger pieces.
Q: How do I thicken the sauce without cornstarch?
A: Simmer the sauce on Sauté to reduce and concentrate it. Alternatively, whisk in a small knob of cold butter off-heat for shine and slight thickening.
Q: Is this recipe kid-friendly?
A: Very much so — the sweet-and-savory profile is broadly appealing. Adjust salt and skip spicy additions for younger palates.
Conclusion
If you want another take on this flavor profile or inspiration for similar make-ahead dinners, this version from Instant Pot Honey Garlic Chicken – Family Fresh Meals offers a helpful comparison and extra tips.
Print
Instant Pot Honey Garlic Chicken
- Total Time: 30 minutes
- Yield: 4 servings
- Diet: Gluten-Free
Description
A sweet-savory one-pot dinner that’s quick, budget-friendly, and kid-approved.
Ingredients
- 1 lb chicken breasts
- 1/2 cup honey
- 1/4 cup soy sauce (or low-sodium soy sauce)
- 4 cloves garlic, minced
- 1 tablespoon olive oil
- Salt and pepper to taste
- Green onions for garnish
Instructions
- Turn the Instant Pot to Sauté and add the olive oil. Heat until shimmering.
- Season the chicken breasts lightly with salt and pepper. Add them to the pot and brown for 1–2 minutes per side.
- In a small bowl, whisk together the honey, soy sauce, and minced garlic until smooth.
- Pour the honey-garlic mixture over the seared chicken and scrape up any browned bits.
- Close the lid and set to Manual/High pressure for 10 minutes, ensuring the valve is set to “Sealing.”
- When the cook time finishes, allow a natural pressure release for 5 minutes, then quick-release the remaining pressure.
- Remove the chicken to a cutting board. If thicker glaze is desired, switch to Sauté and simmer the sauce for 2–4 minutes.
- Slice the chicken and serve topped with green onions.
Notes
For more forgiving results, use boneless skinless chicken thighs. Swap maple syrup for honey if needed, and use tamari or coconut aminos for a gluten-free option.
- Prep Time: 8 minutes
- Cook Time: 10 minutes
- Category: Main Course
- Method: Pressure Cooking
- Cuisine: Asian


